Introduction:
The fast-paced nature of modern development environments necessitates meticulous control over access to container image repositories within the Quay Registry. However, managing a multitude of login credentials can significantly impede developer efficiency. This blog post dives into the powerful solution of ADFS Quay Registry integration. This integration offers organizations a strategic approach to optimize user access control and solidify security within their container registry. By leveraging their existing Active Directory Federation Services (ADFS) credentials, users can effortlessly access container images stored in the Quay Registry. This streamlined approach not only enhances developer productivity but also simplifies user management and enforces granular control within the Quay Registry environment, fostering a more secure and efficient workflow.
Prerequisites:
- OpenShift Cluster (4.12).
- Quay Images (3.11).
- Quay bridge images (3.11).
- RHEL 8 VM (Min 8 GI of memory).
- Object storage (S3,Azure Storage, etc…)
What Is Quay?
Quay is a popular open-source container image registry designed for security, scalability, and automation. It allows developers to build, store, organize, and effortlessly deploy containerized applications.
Quay integrates with various tools and workflows, making it a central hub for managing container images throughout the development lifecycle.
What Is ADFS?
Active Directory Federation Services (ADFS) is a Microsoft technology that implements federated identity management. It acts as a central authentication authority, enabling secure access to corporate resources beyond the traditional network perimeter.
ADFS achieves this by federating identities, which allows users to leverage their existing Active Directory credentials to seamlessly access various applications and services, both within the enterprise domain and from trusted external sources.
Procedure:
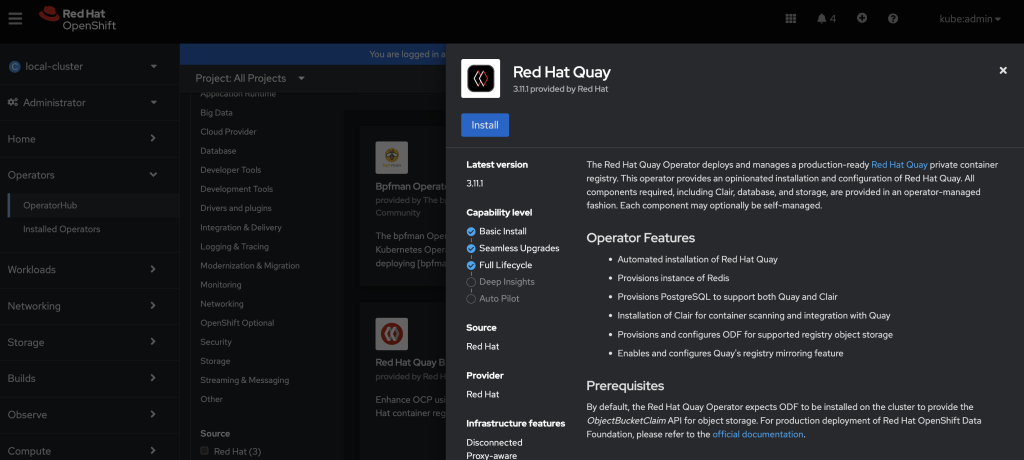
Installation of Red Hat Quay Operator from the Operator Hub
- Using the OpenShift Container Platform console, select Operators → Operator Hub.
- In the search box, type Red Hat Quay and select the official Red Hat Quay Operator provided by Red Hat. This directs you to the Installation page, which outlines the features, prerequisites, and deployment information.
- Select Installation. This directs you to the Operator Installation page.
- Choose a specific version, for example,stable-3.11.
- Select Install.
Configure Red Hat Quay
The Red Hat Quay Operator simplifies deploying Quay Registry on OpenShift. It automates the provisioning of Quay’s dependencies (database, Redis, storage, etc.) using OpenShift resources. For advanced users, the operator allows using pre-configured external resources for more control.
Config bundle secret
Now We can create a configuration file with the appropriate settings. Setting these options before deployment can reduce the need to interact with the user interface.
This secret will be defined in config.yaml, SSL cert, and SSL key.
Config.yaml
If you want to configure by your choice, check Quay Configuration.
ALLOW_PULL_WITHOUT_STRICT_LOGGING: FALSE
AUTHENTICATION_TYPE: OIDC
DEFAULT_TAG_EXPIRATION: 2w
ENTERPRISE_LOGO_URL: /static/img/RH_logo_Quay_Black_UX-horizontal.svg
FEATURE_BUILD_SUPPORT: false
FEATURE_SUPERUSERS_ORG_CREATION_ONLY: true
FEATURE_SUPERUSERS_FULL_ACCESS: true
FRASH_LOGIN_TIMEOUT: 365d
FEATURE_DIRECT_LOGIN: true
FEATURE_USERNAME_CONFIRMATION: flase
FEATURE_USER_CREATION: true
FEATURE_SUPER_USERS: true
DB_CONNECTION_ARGS:
    autorollback: true
    threadlocals: true
    timeout: 5400
DB_URI: postgresql://<Username>:<password>@<ip_address>:5432/quay
DISTRIBUTED_STORAGE_CONFIG:
     S3Storage:
     - S3Storge
     - host: <hostname>
        s3_access_key: <S3_access_key>
        s3_bucket: <S3_bucket>
        s3_secret_key: <S3_secret_key>
        storage_path:  /path/
DISTRIBUTED_STORAGE_DEFAULT_LOCTIONS:
    - S3Storage
DISTRIBUTED_STORAGE_PREFERENCE:
    - S3Storage
SERVER_HOSTNAME: <hostname for the quay>
FEATURE_MAILING: false
REGISTRY_TITLE: Red Hat Quay
REGISTRY_TITLE_SHORT: Red Hat Quay
SETUP_COMPLETE: true
SUPER_USERS:
- quay
TAG_EXPIRATION_OPTIONS:
- 2w
TESTING: false
PREFERRED_URL_SCHEME: https
EXTERNAL_TLS_TERMINATION: true
OIDC_LOGIN_CONFIG:
    CLIENT_ID: <ADFS_CLIENT_ID>
    CLIENT_SECRET: <ADFS_CLIENT_SECRET>
    OIDC_SERVER: <ADFS_URL>/adfs
    SERVICE_NAME: OIDC
    OIDC_DISABLE_USER_ENDPOINT: true
    VERIFIED_EMAIL_CLAIM_NAME: email
    LOGIN_SCOPES:
    - openid
    - email
If you’d like to use a local ssl.key / ssl.crt for Secure Connection – Create csr_answer.txt file
csr_answer.txt
cat > csr_answer.txt << EOF
[req]
default_bits = 4096
prompt = no
default_md = sha256
x509_extensions = req_ext
req_extensions = req_ext
distinguished_name = dn

[ dn ]
C=US
ST=New York
L=New York
O=MyOrg
OU=MyOU
emailAddress=me@working.me
CN=registry

[ req_ext ]
subjectAltName = @alt_names
subjectKeyIdentifier = hash
authorityKeyIdentifier = keyid:always,issuer
basicConstraints = critical, CA:true
keyUsage = critical, digitalSignature, cRLSign, keyCertSign

[ alt_names ]
DNS.1 = hostname
DNS.2 = hostname.example.com
Now run this command to create the certificate request:
openssl req -newkey rsa:4096 -nodes -sha256 -keyout ssl.key -x509 -days 3650 -out ssl.crt -config <(cat csr_answer.txt)Now let’s create the secret:
oc create secret generic --from-file config.yaml=./config.yaml --from-file ssl.cert=./ssl.cert --from-file ssl.key=./ssl.key config-bundle-secretQuay Registry
Red Hat Quay relies on various components like Databases, object storage, Redis and more to function.
These components are managed through a special configuration called the Quay Registry API.
Within this API, a section named “spec. Components” defines each dependency.
Each component has two properties: “kind,” which identifies the component type, and “managed,” indicating if the Red Hat Quay Operator controls its lifecycle.
By default, the Operator automatically manages all components.
Let’s create Quay Registry resource.
apiVersion: quay.redhat.com/v1
kind: QuayRegistry
metadata:
name: example-registry
namespace: quay-enterprise
spec:
configBundleSecret: config-bundle-secret
components:
- kind: quay
managed: true
- kind: postgres
managed: true
- kind: clair
managed: false
- kind: redis
managed: true
- kind: horizontalpodautoscaler
managed: false
- kind: objectstorage
managed: false
- kind: route
managed: true
- kind: mirror
managed: false
- kind: monitoring
managed: false
- kind: tls
managed: false
- kind: clairpostgres
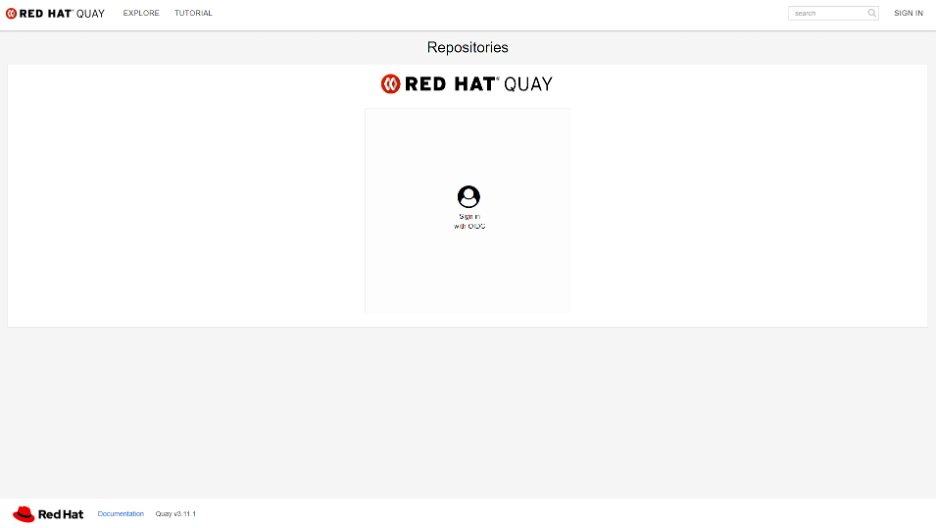
managed: falseAfter the registry endpoint has a value, we can navigate to the Quay URL in your browser and connect with your user that was validated with the adfs.
How to Authenticate and Use the Quay
In the first step, you need to access the route/entry address. In the first step, you need to access the route/entry address. On the login screen, please click the middle of the screen to connect with your user.
Now, you are in the Quay registry, and you can create repositories and pull and push images.
For pulling and pushing, you need to click the profile in the right corner and choose Account Settings.

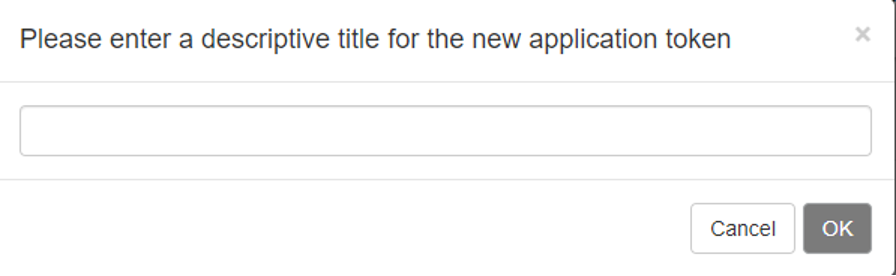
After that, Please choose the option of Create Application Token and choose the name of the token.

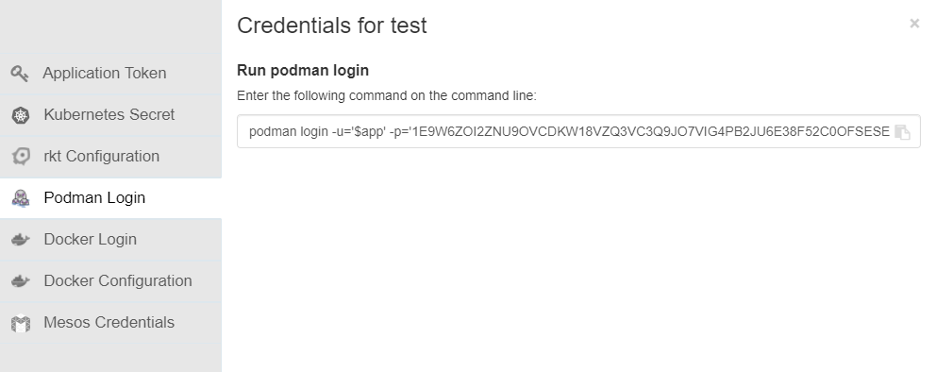
On the final step, click on the name of the token, and you can see several options to do. For example, Docker/Podman Login for push and pull, configure the config.json, etc.
Summary
Quay Registry’s integration with ADFS allows organizations to leverage their existing ADFS infrastructure to tightly control access to container images within Quay Registry. This streamlines the login process by allowing users to access the Quay Registry using their familiar ADFS credentials. By leveraging ADFS, organizations can simplify user management and eliminate the need for separate Quay Registry credentials, fostering a more secure and efficient container image access workflow.