Introduction
As the last task at the bootcamp we were asked to create a friendly graphical user interface(GUI) to the famous virtualization platform ‘Proxmox’, so we came up with Proxify the target of this GUI is to make Proxmox less bulky and more intuitive. in addition to that we were tasked to do that with NextJS framework.
What is Proxmox ?
Proxmox Virtual Environment is a virtualisation platform designed for the provisioning of hyper-converged infrastructure. Proxmox allows deployment and management of virtual machines and containers. It is based on a modified Ubuntu LTS kernel
Why NextJS ?
Next.js is an open-source web development framework created by the private company Vercel providing React-based web applications with server-side rendering and static website generation. using NextJS will ensure that the app can be easily maintained and further developed.
What is Proxify ?
Proxify is an open source tool that connects to Proxmox with Proxmox API and serves as a mediator between Proxmox and someone who doesn’t have enough experience or knowledge in Proxmox platform, in addition to that Proxify connect to Proxmox and lets you avoid giving access to Proxmox to too much people, you can let them use Proxify instead
What are Proxify’s capabilities ?
- Listing resources : node, virtual machines(VMs)
- Starting and stopping VMs
- Provisioning VMs
- Uploading new images for VM provisioning
- Checking logs
How to setup Proxify ?
Prerequisites:
- Make sure to install NodeJS
- Proxify uses MongoDB, make sure to setup a DB instance (mongoDB container or mongoDB atlas)
- Proxmox user with permissions to access the API , press for Help
Setting up Proxify
- Now clone the the repository
- Install dependencies with the following command
$ npm install - Edit ‘next.config.js’ with the parameters of your API and MongoDB URI
- Now run the dev server
$ npm run dev- Visit localhost:3000 in your web browser to access Proxify
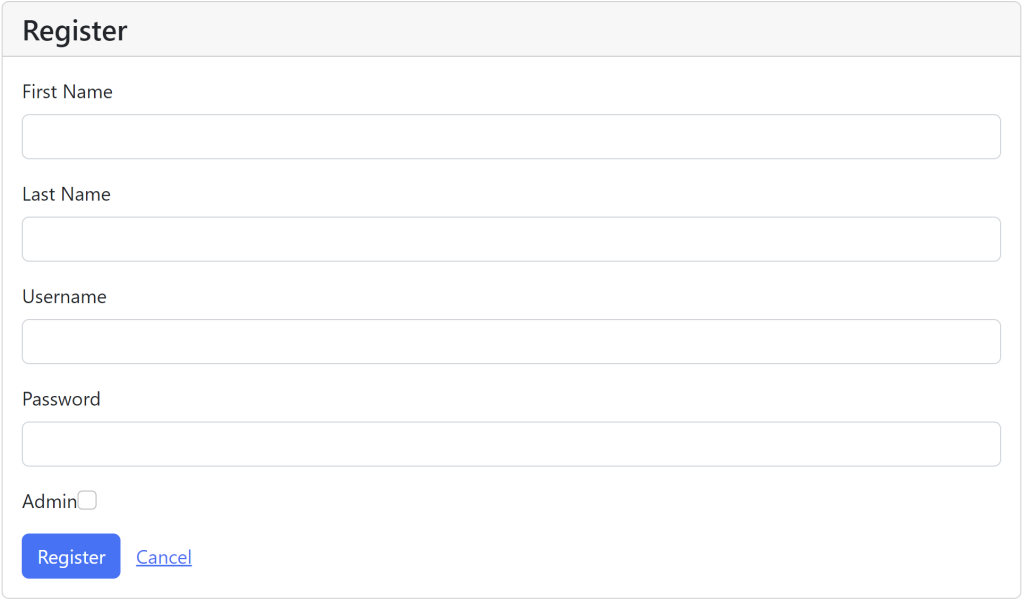
- Create a new user with ‘admin’ box checked
Overview
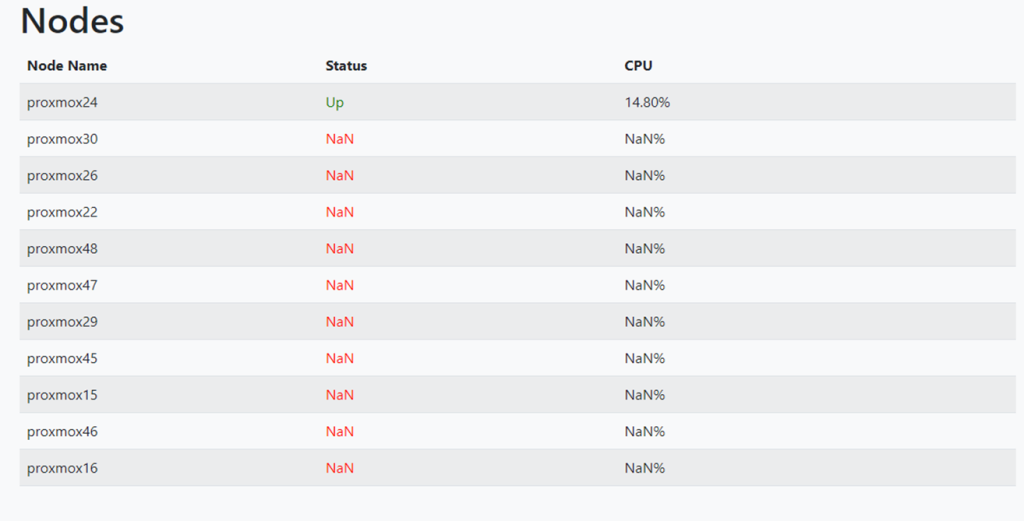
Nodes
In the nodes page you can view the nodes in your Proxmox, their status and their CPU usage.
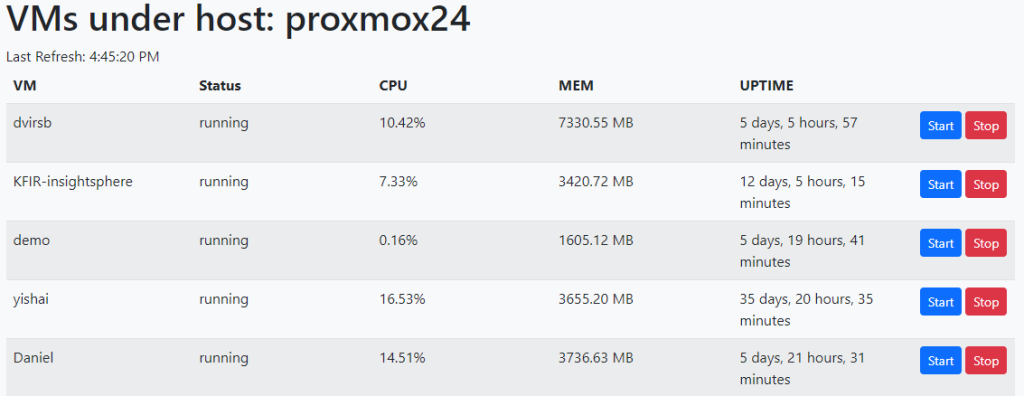
VMs
Under the VMs category you can see your currently running virtual machines and start/stop them if needed.
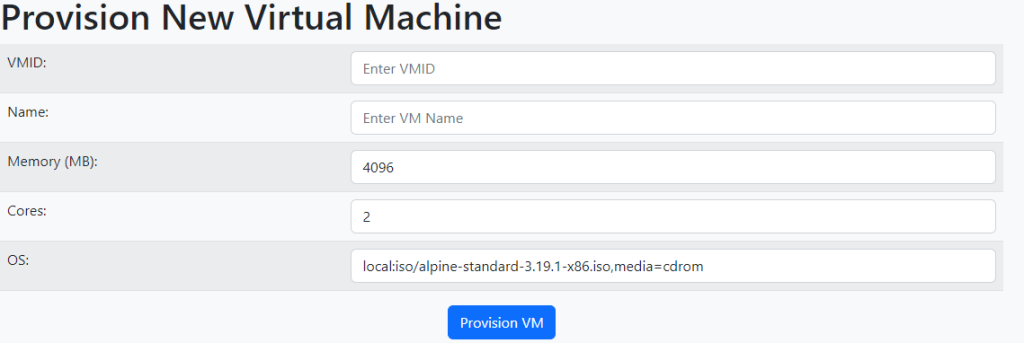
Provision
In this tab you can provision new virtual machines, too keep the GUI as simple as possible we limited the configuration options in order not to confuse the user, the point of Proxmox is to be a simple GUI.
Options for VM provisioning:
- VMID – id for your vm (must be unique across all nodes).
- Name – simple name.
- Memory (MB) – the amount of memory you need.
- Cores – how many cores you need for your vm.
- OS – the operating system your need your vm to run on.
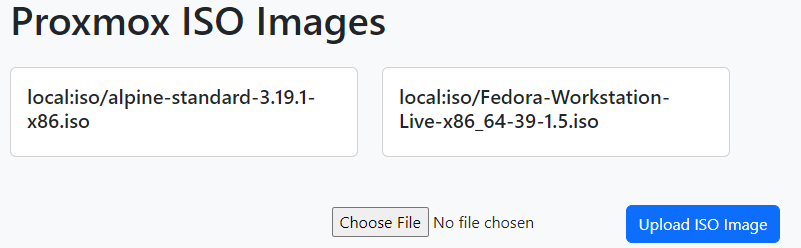
Images
Here you can view and upload ISO files of operating systems directly to Proxmox.
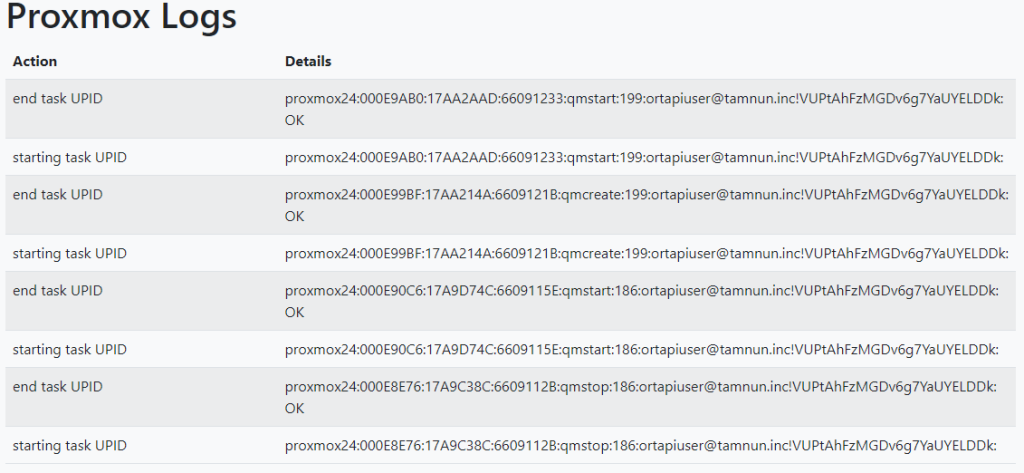
Logs
In this page you can see the last task that were performed by Proxify
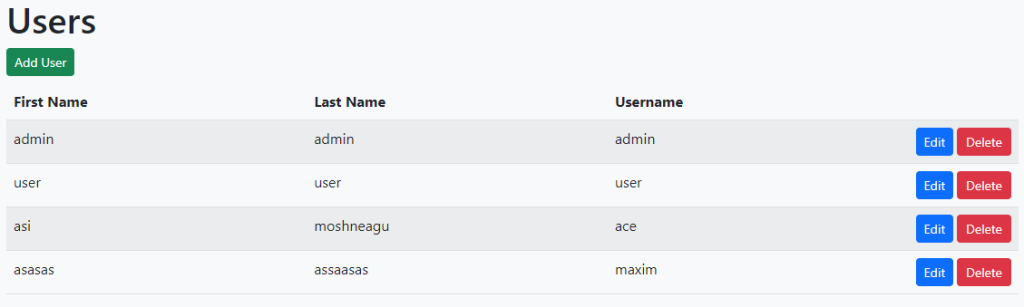
Users
This page is to manage the users in Proxify, here add/delete or edit user information.
Summery
Congratulations, you have setup Proxify for your Proxmox, remember Proxify is an open source project, you are welcome you edit Proxify to your need.
If you liked this article and this project interested you don’t forget to take a look at other projects in this blog