Introduction
In today’s fast-paced world of software development, automating your CI/CD pipeline is a game-changer. It helps you release faster, catch issues early, and keep everything running smoothly. In this guide, Create a CI/CD Process Using GitLab and ArgoCD? Part 1, I’ll walk you through setting up a simple pipeline using GitLab CI/CD for continuous integration and ArgoCD for continuous delivery. GitLab and ArgoCD are two powerful tools that, when used together, make this process highly effective. Whether you’re just getting started with CI/CD or looking to improve your current workflow, this guide will help you automate your development pipeline from start to finish.
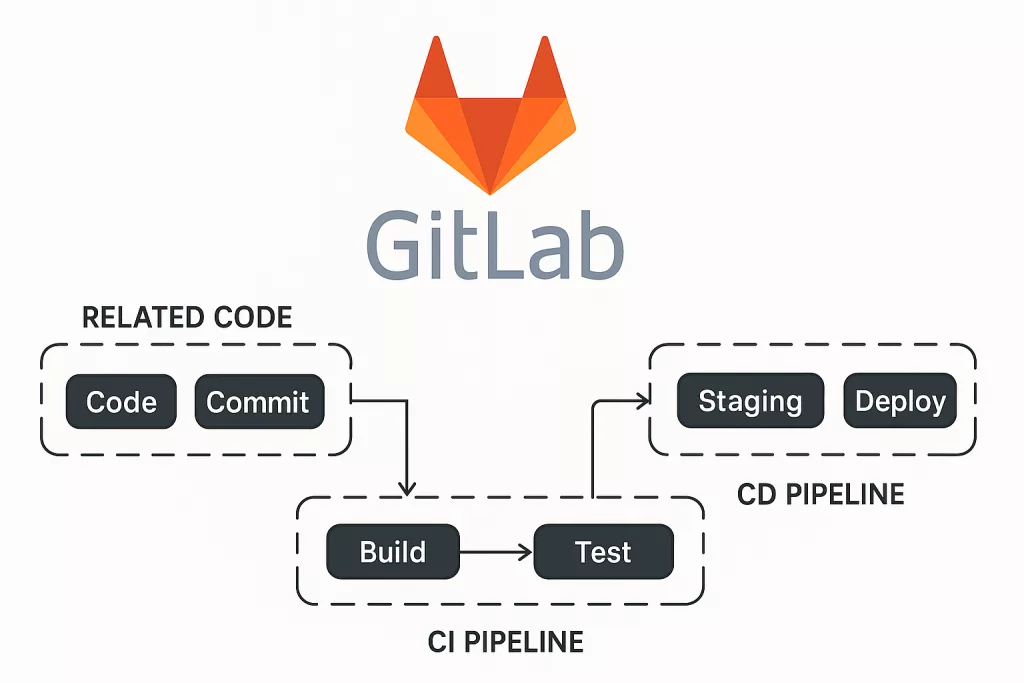
CI/CD Process
What You’ll Do Today
Today, we’ll build and push a simple Node.js app along with a MongoDB database. To demonstrate the full pipeline, the app will display a webpage, running within your Kubernetes cluster. As the first step in the CI process, we’ll build the app and database images, and then push them to your preferred image registry. After the CI pipeline is in place, we’ll move on to setting up CD with ArgoCD, linking it to our repository, and getting the continuous delivery process up and running.
How Will the CI process Work?
GitLab CI works by using a set of pipelines defined in a .gitlab-ci.yml file, which outlines the steps to build, test, and deploy your application. To make this process work, GitLab CI relies on runners – lightweight, isolated environments (typically containers or virtual machines) that execute the commands specified in the pipeline.
However, since the GitLab runner typically runs inside a container, it doesn’t have access to Docker commands by default. As a result, we can’t directly build and push Docker images from within the runner itself. To overcome this limitation, we’ll use SSH to connect from the runner to a host machine where Docker is installed. This approach allows us to run Docker commands on that host, effectively enabling the build and push process to your image registry.
If you’re not familiar with Docker containers and container orchestration, I recommend checking out How to Prepare a Node.js Application for Kubernetes? before continuing with this one.
In GitLab CI, environment variables are key to managing configurations, sensitive data, and secrets that your pipeline needs. To begin with, you can define variables directly in the .gitlab-ci.yml file. However, for improved security and flexibility, it’s better to store them in GitLab’s UI under Settings > CI / CD > Variables. Once set, these variables can be used throughout your pipeline and are automatically injected into the runner environment when the pipeline runs. As a result, you can manage things like API keys, database credentials, and Docker registry passwords without hardcoding them into your repository
Before the Pipeline: Setting Up Required Scripts
Before we dive into the GitLab pipeline itself, we need to create a few scripts that the pipeline will use during its execution. These scripts handle the core steps of our CI process and help keep the pipeline clean, modular, and easy to maintain. For this guide, we’ll create four essential scripts:
1. A script to build a container image using the latest code from the repository.
2. A script to run tests and verify that the code works as expected.
3. A script to push the image to a container registry.
4. A script to update the deployment manifest with the new image tag.
By writing these scripts ahead of time, we make our CI pipeline more flexible and reusable. Additionally, separating the logic from the .gitlab-ci.yml file helps keep the configuration clean and easier to maintain. To get started, we’ll create a directory called scripts in the root of our repository. This is where the pipeline will look for the necessary scripts during execution.
reporootdir$ mkdir scripts
reporootdir$ cd scripts
build.sh Set Up:
#!/bin/bash
COMMIT_SHORT_SHA=$(git rev-parse --short HEAD)
GITLAB_REPO="<example.registry>:$COMMIT_SHORT_SHA"
GITLAB_REPO_DB="<example.registry/db>:$COMMIT_SHORT_SHA"
echo "Building app image..."
docker build -t "$GITLAB_REPO" -f ./application/Dockerfile ./application
echo "Building DB image..."
docker build -t "$GITLAB_REPO_DB" -f ./application/db/Dockerfile ./application/db
echo "changing docker-compose.yaml image to $GITLAB_REPO_DB"
sed -i "s|\(image: <example.registry>\):.*|\1:$COMMIT_SHORT_SHA|" application/docker-compose.yaml
test.sh Set Up:
#!/bin/bash

echo "Running test..."
curl localhost:3000
RESPONSE=$(curl -s http://localhost:3000)
if echo "$RESPONSE" | grep -q "apples" && \
    echo "$RESPONSE" | grep -q "bananas" && \
    echo "$RESPONSE" | grep -q "oranges" && \
    echo "$RESPONSE" | grep -q "avocados"; then
echo "All words found! Test result: APPROVED"
else
echo "One or more words are missing! Test result: FAILED"
exit 1
fi
echo "test script fnished"
push.sh Set Up:
#!/bin/bash
COMMIT_SHORT_SHA=$(git rev-parse --short HEAD)
GITLAB_REPO="<example.registry>:$COMMIT_SHORT_SHA"
GITLAB_REPO_DB="<example.registry/db>:$COMMIT_SHORT_SHA"
echo "Pushing app image to the registry."
docker push "$GITLAB_REPO"
echo "Pushing DB image to the registry."
docker push "$GITLAB_REPO_DB"
docker rmi $GITLAB_REPO $GITLAB_REPO_DB
update-tags.sh Set Up:
#!/bin/bash
NEW_TAG=$(git rev-parse --short HEAD)
APP_DEPLOYMENT="./k8s-yamls/app-deployment.yaml"
MONGODB_DEPLOYMENT="./k8s-yamls/mongodb-deployment.yaml"
# Update app-deployment.yaml
echo "Updating image tag in $APP_DEPLOYMENT to $NEW_TAG..."
sed -i "s|\(image: <example.registry>\):.*|\1:$NEW_TAG|" $APP_DEPLOYMENT
# Update mongodb-deployment.yaml
echo "Updating image tag in $MONGODB_DEPLOYMENT to $NEW_TAG..."
sed -i "s|\(image: <example.registry/db>\):.*|\1:$NEW_TAG|" $MONGODB_DEPLOYMENT
git add .
git commit -m "images updated by the CI process"
git push -o ci.skip
echo "Image tags updated to $NEW_TAG in both deployment files."
.gitlab-ci.yaml Set Up
Create a .gitlab-ci.yml file in the root directory of your repository, and let’s write our first job in our pipeline:
build-and-test:
  stage: test
  image: docker_proxy_cache/library/alpine:3
  before_script:
    - apk add --no-cache openssh-client
    - mkdir -p ~/.ssh
    - echo "$SSH_PRIVATE_KEY" > ~/.ssh/id_rsa
    - chmod 600 ~/.ssh/id_rsa
    - ssh-keyscan $BASTION_IP >> ~/.ssh/known_hosts
  script:
    - |
      ssh bastion@$BASTION_IP "
        cd /home/bastion/octopus-exercise &&
        echo \"$CI_REGISTRY_PASSWORD\" | docker login \"$CI_REGISTRY\" -u \"$CI_REGISTRY_USER\" --password-stdin &&
        git pull &&
        bash scripts/build.sh &&
        cd application &&
        docker-compose up -d --build &&
        sleep 7 &&
        cd .. &&
        bash scripts/test.sh &&
        cd application &&
        docker-compose down -v
      "
What This Job Does?
The build-and-test job runs during the pipeline’s test stage. It uses a lightweight Alpine Linux image from a local Docker proxy. First, it installs the SSH client to enable remote access. Then, it sets up a private SSH key using the $SSH_PRIVATE_KEY secret. Next, it sets permissions and adds the bastion server to known hosts. Once ready, it connects to the bastion using $BASTION_IP. After connecting, it navigates to the octopus-exercise project folder.
Then, the job logs into the container registry with Docker and pulls the latest code from Git. It runs the build.sh script to start the build process. After that, it enters the application folder and starts services using docker-compose. To allow services to start, it waits 7 seconds. Finally, it runs test.sh to execute tests, then stops and cleans up containers.
If the test succeeds, we will now add the next job, which will push the images to our registry:
push-to-registry:
  stage: push
  image: docker_proxy_cache/library/alpine:3
  before_script:
    - apk add --no-cache openssh-client
    - mkdir -p ~/.ssh
    - echo "$SSH_PRIVATE_KEY" > ~/.ssh/id_rsa
    - chmod 600 ~/.ssh/id_rsa
    - ssh-keyscan $BASTION_IP >> ~/.ssh/known_hosts
  script:
    - |
      ssh bastion@$BASTION_IP "
        cd /home/bastion/octopus-exercise &&
        echo \"$CI_REGISTRY_PASSWORD\" | docker login \"$CI_REGISTRY\" -u \"$CI_REGISTRY_USER\" --password-stdin &&
        git pull &&
        bash scripts/push.sh"
This job will connect to a remote server again(bastion), logs into the container registry, pulls the latest code, and runs the push.sh script – which pushes the container images that were built in the previous job to the registry.
After pushing and updating our image registry, the last step is to update the deployment files with the new image tag (this is important for the Continuous Deployment process later on).
tag-yamls:
  stage: tag
  image: docker_proxy_cache/library/alpine:3
  before_script:
    - apk add --no-cache openssh-client
    - mkdir -p ~/.ssh
    - echo "$SSH_PRIVATE_KEY" > ~/.ssh/id_rsa
    - chmod 600 ~/.ssh/id_rsa
    - ssh-keyscan $BASTION_IP >> ~/.ssh/known_hosts
  script:
    - |
      ssh bastion@$BASTION_IP "
        cd /home/bastion/octopus-exercise &&
        echo \"$CI_REGISTRY_PASSWORD\" | docker login \"$CI_REGISTRY\" -u \"$CI_REGISTRY_USER\" --password-stdin &&
        git pull &&
        bash scripts/update-tags.sh"
This job connects to the remote bastion server, logs into the container registry, pulls the latest code, and runs the update-tags.sh script – which updates the image tags in the deployment YAML files using sed. This ensures the deployments point to the newly pushed images.
What will be the Result?
This job tests the application using the latest source code. If all tests pass, it builds a new container image and pushes it to the registry.
Next, the pipeline updates the deployment files with the new image tag. To finish, the runner commits these changes without triggering another pipeline, avoiding a CI loop.
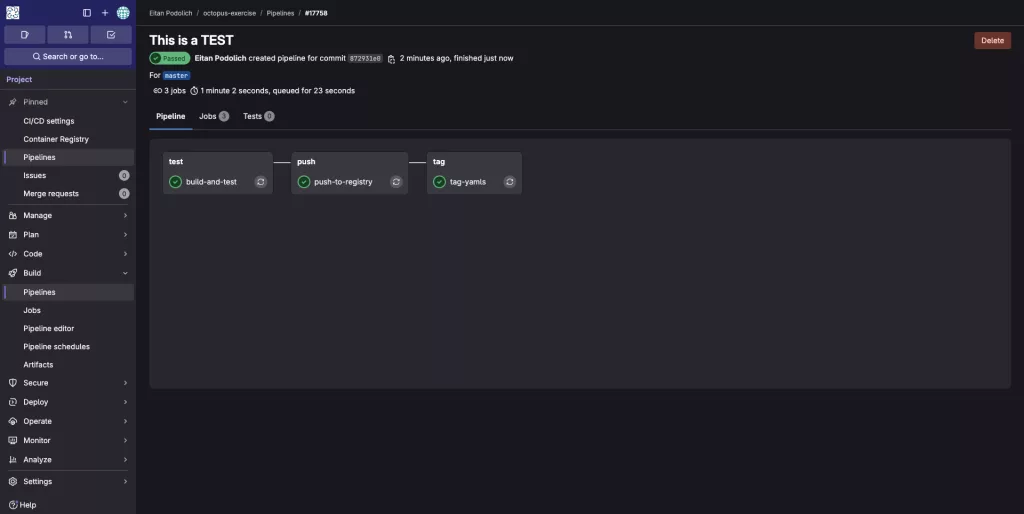
The final result should show a passed test stage, 2 pushed images, and updated deployment files committed to the repository.
First, commit the code changes:
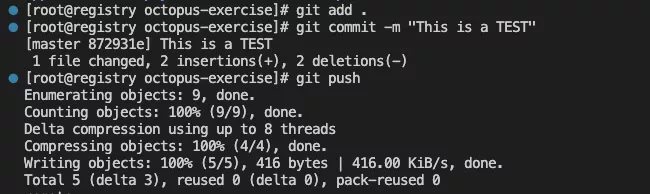
After committing, navigate to: GitLab Repository > Build > Pipelines, then click the pipeline named after your commit message. There, you’ll see all three jobs that were successfully initialized:
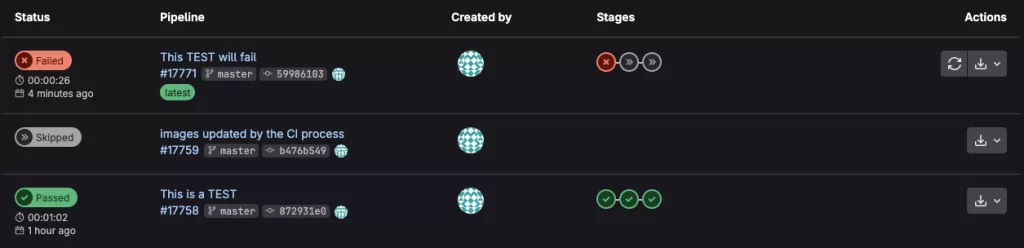
Note: There are two commits involved – one by the developer, and the second by the CI process itself. The CI-generated commit automatically skips the pipeline trigger to prevent an infinite loop.

What If The Job Fails?
When a job fails in GitLab CI, the pipeline stops at that point (unless you’ve configured it to continue). GitLab will clearly mark the failed job with a red “failed” label in the pipeline view. This means something went wrong during the job execution – like a failed test, a missing file, or an error in a script.
What to Do When a Job Fails
Go to the pipeline: In GitLab, navigate to: Repository > Build > Pipelines and click the failed pipeline (usually marked in red).
Find the failed job, In the pipeline graph, look for the job with the red “x” icon.
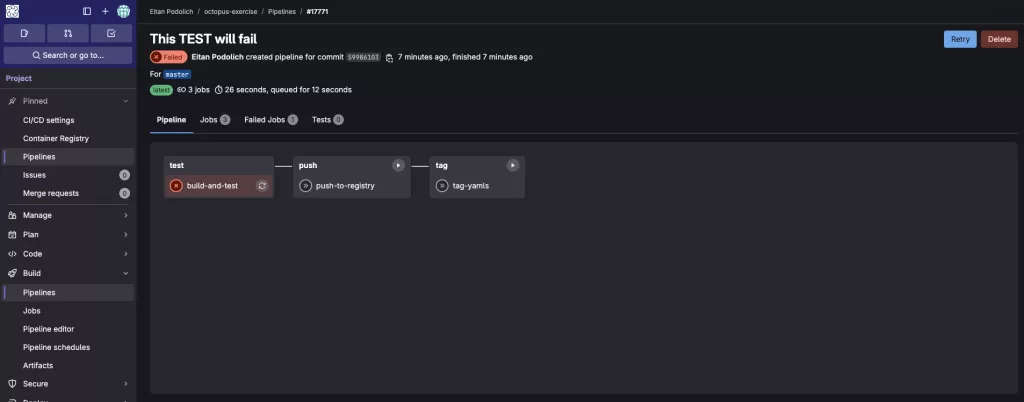
Open the job logs: Click on the failed job name to open its detailed output logs. You’ll see a line-by-line breakdown of what the job was doing before it failed.

As shown in the logs above, the job failed because the runner couldn’t enter the directory named octopus-exercise-wrong-name – because it doesn’t exist. As a result, the runner exited and stopped the job immediately when the error occurred.
To fix this, I need to go back to my code, find the correct directory name, and update it in the .gitlab-ci.yml pipeline definition.
Summary
In this guide, we set up a GitLab CI/CD pipeline to automate building, testing, and deploying your application. We created scripts to build Docker images, run tests, push to a container registry, and update deployment files.
To handle Docker commands, we used SSH to connect to a Docker-enabled host. This approach ensures a reliable and streamlined CI process.
Whether you’re starting out or improving an existing setup, this guide gives you a solid CI/CD foundation.
To complete the CI/CD workflow, be sure to check out the next part: Create a CI/CD Process Using GitLab and ArgoCD? Part 2, where we’ll cover how to implement continuous delivery using ArgoCD and GitOps principles.
Git repository for code and files are at: https://gitlab.octopuscs.com/eitanpod/cicd-exercise.git