Introduction
Longhorn Persistent Storage for Kubernetes provides a pragmatic approach to distributed block storage without introducing external storage appliances or complex integrations. In small to mid-size clusters, especially edge or ARM-based environments, Longhorn offers a predictable storage layer that aligns well with Kubernetes. In this post we walk through a clean installation flow, disk preparation, and a basic workload validation using PersistentVolumeClaims. By the end, Longhorn on Kubernetes will be running with a verified PVC and workload.
Procedure
Node Preparation
Longhorn relies on standard Linux storage and networking components. Before deploying anything into the cluster, each node must be prepared with the following:
$ apt-get update
$ apt-get install -y open-iscsi nfs-common

$ mkdir -p /var/lib/longhorn
$ chmod 700 /var/lib/longhorn
NOTE:
/var/lib/longhornis treated as a dedicated data path.
Namespace Creation
I always seperate the deployments into a different namespace. It’s best for many reasons.
apiVersion: v1
kind: Namespace
metadata:
  name: longhorn-system
Helm-Based Installation
You can deploy using a lot of different options, even with CLI commands and longhornctl command. I chose helm to have a standard and easier management and upgrades. Longhorn is deployed via the Kubernetes Helm controller.
apiVersion: helm.cattle.io/v1
kind: HelmChart
metadata:
  name: longhorn
  namespace: kube-system
spec:
  repo: https://charts.longhorn.io
  chart: longhorn
  targetNamespace: longhorn-system
  valuesContent: |-
    defaultSettings:
      defaultDataPath: /var/lib/longhorn
      createDefaultDiskLabeledNodes: true
      defaultReplicaCount: 2
    persistence:
      defaultClass: true
      defaultFsType: ext4
    ingress:
      enabled: true
      ingressClassName: cilium
      host: longhorn.yourdomain.com
      tls: false
      secureBackends: false
      path: /
      pathType: Prefix
NOTE: We are using cilium in this cluster. If you’d like to know more, you can check How to Deploy Highly Available Cilium on Raspberry Pi
Check that Longhorn was deployed properly:
$ k get pods -n longhorn-system
NAME                                                READY   STATUS    RESTARTS       AGE
csi-attacher-669bb4b589-8bvdn                       1/1     Running   1 (125m ago)   127m
csi-attacher-669bb4b589-hz49c                       1/1     Running   0              127m
csi-attacher-669bb4b589-p66mg                       1/1     Running   0              127m
csi-provisioner-7b88844f9b-8vswb                    1/1     Running   0              127m
csi-provisioner-7b88844f9b-qxmlx                    1/1     Running   1 (125m ago)   127m
csi-provisioner-7b88844f9b-tfxw6                    1/1     Running   0              127m
csi-resizer-689c8c44c4-btqhm                        1/1     Running   1 (125m ago)   127m
csi-resizer-689c8c44c4-c2xg9                        1/1     Running   0              127m
csi-resizer-689c8c44c4-dhc4c                        1/1     Running   0              127m
csi-snapshotter-97674b9f-gnpcx                      1/1     Running   0              127m
csi-snapshotter-97674b9f-nbmr4                      1/1     Running   1 (125m ago)   127m
csi-snapshotter-97674b9f-qnmvp                      1/1     Running   0              127m
engine-image-ei-3154f3aa-cw7kx                      1/1     Running   0              128m
engine-image-ei-3154f3aa-jpj8p                      1/1     Running   0              128m
engine-image-ei-3154f3aa-r6fx8                      1/1     Running   0              128m
engine-image-ei-3154f3aa-th9jz                      1/1     Running   0              128m
instance-manager-85c0b9486fdcfc42b0b265ba85054fa0   1/1     Running   0              128m
instance-manager-8d4cca325b09de4ae75fdc0ab5c0a3bd   1/1     Running   0              127m
instance-manager-bf868408d3e7649c9879ab6220933c13   1/1     Running   0              128m
instance-manager-ec44e3b5ae3ed8285e4d229c37b26777   1/1     Running   0              128m
longhorn-csi-plugin-9jpr5                           3/3     Running   1 (125m ago)   127m
longhorn-csi-plugin-9vdml                           3/3     Running   0              127m
longhorn-csi-plugin-qwg9s                           3/3     Running   0              127m
longhorn-csi-plugin-xphv5                           3/3     Running   0              127m
longhorn-driver-deployer-5c69c6c4d6-5hvvd           1/1     Running   0              129m
longhorn-manager-cm6wk                              2/2     Running   1 (128m ago)   129m
longhorn-manager-r6gnh                              2/2     Running   1 (128m ago)   129m
longhorn-manager-rpc88                              2/2     Running   0              129m
longhorn-manager-vtkjc                              2/2     Running   1 (128m ago)   129m
longhorn-ui-84d97876df-pckl9                        1/1     Running   0              129m
longhorn-ui-84d97876df-sdsl6                        1/1     Running   0              129m
Node and Disk Validation
Now that all is deployed, let’s add disks to nodes.
- Go to the longhorn dashboard:
https://longhorn.yourdomain.com/ - Press Nodes at the top, and edit a node:
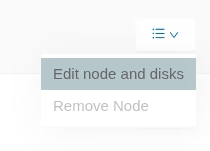
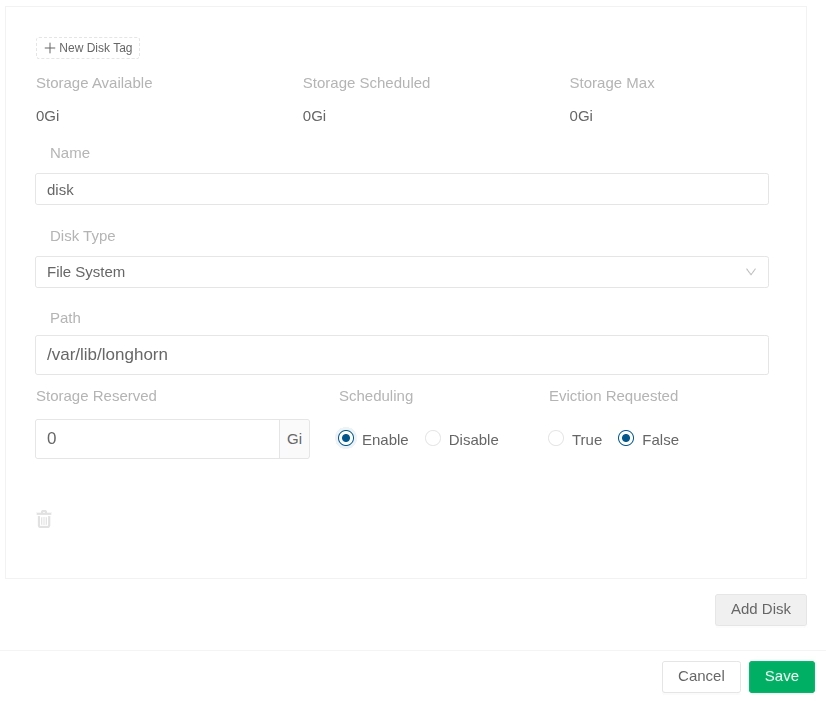
Add a disk as follows:
After adding to all nodes the disks, wait a few minutes and you should see the status as follows:
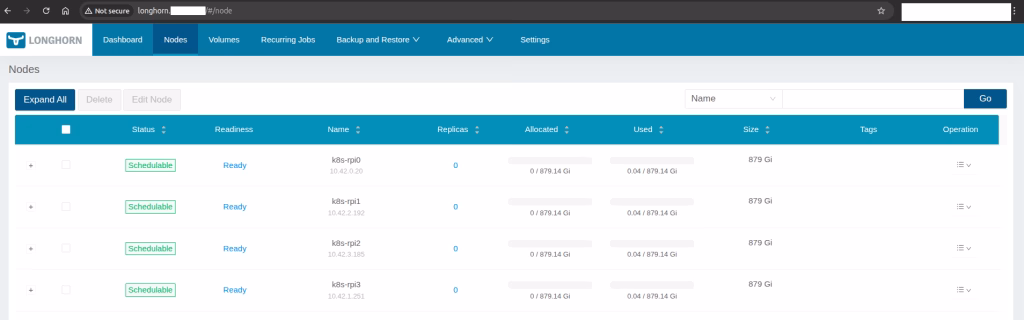
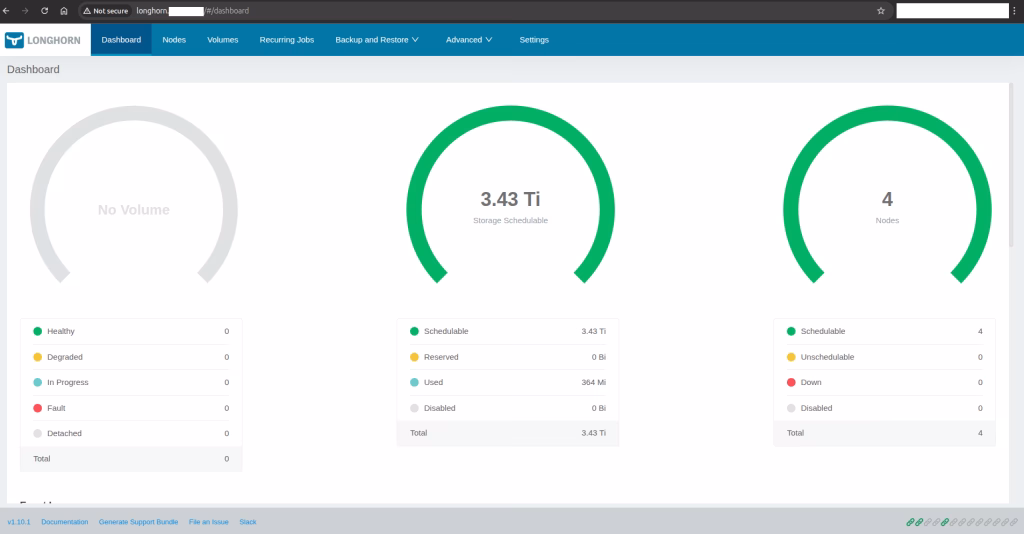
Dashabord status:
Now let’s test a pod that is working.
StorageClass Definition
We will configure a StorageClass. A dedicated StorageClass ensures predictable behavior for workloads.
apiVersion: storage.k8s.io/v1
kind: StorageClass
metadata:
  name: longhorn
  annotations:
    storageclass.kubernetes.io/is-default-class: "true"
provisioner: driver.longhorn.io
allowVolumeExpansion: true
parameters:
  numberOfReplicas: "2"
reclaimPolicy: Retain
You should have something like this:
$ kubectl get sc
NAME                 PROVISIONER             RECLAIMPOLICY   VOLUMEBINDINGMODE      ALLOWVOLUMEEXPANSION   AGE
local-path           rancher.io/local-path   Delete          WaitForFirstConsumer   false                  336d
longhorn (default)   driver.longhorn.io      Delete          Immediate              true                   145m
longhorn-static      driver.longhorn.io      Delete          Immediate              true                   145m
Pod Creation
We can use https://raw.githubusercontent.com/longhorn/longhorn/v1.10.1/examples/pod_with_pvc.yaml example from Longhorn to test.
apiVersion: v1
kind: PersistentVolumeClaim
metadata:
  name: longhorn-volv-pvc
  namespace: default
spec:
  accessModes:
    - ReadWriteOnce
  storageClassName: longhorn
  resources:
    requests:
      storage: 2Gi
---
apiVersion: v1
kind: Pod
metadata:
  name: volume-test
  namespace: default
spec:
  restartPolicy: Always
  containers:
  - name: volume-test
    image: nginx:stable-alpine
    imagePullPolicy: IfNotPresent
    livenessProbe:
      exec:
        command:
          - ls
          - /data/lost+found
      initialDelaySeconds: 5
      periodSeconds: 5
    volumeMounts:
    - name: volv
      mountPath: /data
    ports:
    - containerPort: 80
  volumes:
  - name: volv
    persistentVolumeClaim:
      claimName: longhorn-volv-pvc
After creating it we can see in the running pod:
$ k get pods
NAME                     READY   STATUS    RESTARTS       AGE
volume-test              1/1     Running   0              41s
And the pod logs:
$ k logs volume-test
/docker-entrypoint.sh: /docker-entrypoint.d/ is not empty, will attempt to perform configuration
/docker-entrypoint.sh: Looking for shell scripts in /docker-entrypoint.d/
/docker-entrypoint.sh: Launching /docker-entrypoint.d/10-listen-on-ipv6-by-default.sh
10-listen-on-ipv6-by-default.sh: info: Getting the checksum of /etc/nginx/conf.d/default.conf
10-listen-on-ipv6-by-default.sh: info: Enabled listen on IPv6 in /etc/nginx/conf.d/default.conf
/docker-entrypoint.sh: Sourcing /docker-entrypoint.d/15-local-resolvers.envsh
/docker-entrypoint.sh: Launching /docker-entrypoint.d/20-envsubst-on-templates.sh
/docker-entrypoint.sh: Launching /docker-entrypoint.d/30-tune-worker-processes.sh
/docker-entrypoint.sh: Configuration complete; ready for start up
2025/12/20 15:37:53 [notice] 1#1: using the "epoll" event method
2025/12/20 15:37:53 [notice] 1#1: nginx/1.28.0
2025/12/20 15:37:53 [notice] 1#1: built by gcc 14.2.0 (Alpine 14.2.0)
2025/12/20 15:37:53 [notice] 1#1: OS: Linux 6.8.0-1031-raspi
2025/12/20 15:37:53 [notice] 1#1: getrlimit(RLIMIT_NOFILE): 1048576:1048576
2025/12/20 15:37:53 [notice] 1#1: start worker processes
2025/12/20 15:37:53 [notice] 1#1: start worker process 30
2025/12/20 15:37:53 [notice] 1#1: start worker process 31
2025/12/20 15:37:53 [notice] 1#1: start worker process 32
2025/12/20 15:37:53 [notice] 1#1: start worker process 33
And most important, the the example relevant to this post. We can also see it from the dashboard

Summary
Longhorn Persistent Storage for Kubernetes demonstrates that distributed block storage does not need to be complex to be reliable. By keeping installation steps explicit and storage paths predictable, Longhorn integrates cleanly into standard Kubernetes workflows. The validated PVC lifecycle confirms correct scheduling, replica management, and attachment behavior. This setup is well-suited for labs, edge clusters, and production environments that prioritize clarity and control. With Longhorn, storage becomes an extension of the cluster rather than an external dependency.
At Octopus Computer Solutions, similar deployments are executed regularly in real production environments, including edge, ARM, and constrained clusters where predictability is critical. Our advantage lies in supportable architectures that align with operational realities rather than lab assumptions. By combining deep Kubernetes expertise with hands-on storage troubleshooting experience, Octopus helps organizations adopt distributed storage with confidence and clear operational boundaries