Introduction
As we wrap up our second week at the Octopus Computer Solutions bootcamp, we’ve delved into real-world scenarios of application development and deployment. Assigned with the task of creating a Python application, containerizing it, and orchestrating its deployment using Kubernetes and Helm charts, we’ve tackled the complexities of modern software deployment.
In this article, I’ll take you through the steps I’ve undertaken to meet this challenge head-on. From coding the Python application to establishing a local registry with Harbor, configuring Kubernetes deployment manifests, and crafting a Helm chart complete with an Ingress controller, each phase has provided valuable insights and hands-on experience.
What is Harbor?
Harbor is an open-source container registry for secure storage and distribution of container images, ensuring a reliable software supply chain with features like access control and vulnerability scanning.
What is Kind?
Kind is a tool that allows developers to run local Kubernetes clusters using Docker containers. It simplifies the process of setting up Kubernetes environments for testing and development purposes on individual machines.
What are Helm Charts?
Helm charts streamline application deployment and management on Kubernetes clusters by providing pre-configured Kubernetes resource packages. They encapsulate Kubernetes manifests into a single package, simplifying installation, upgrading, and management processes.
Deploying the Kubernetes Cluster and Harbor
Prerequisites
- RHEL machine with sudo privileges
- Basic familiarity with terminal commands
- Kubernetes cluster 1.10+
- Docker & Docker-Compose
- Helm 2.8.0+
Installing and Deploying a Cluster with Kind
Beginning with Kind, the installation process involves executing a command outlined in the official Kind documentation.
On Linux:
# Download and Install Kind Binary - Click to view kind documentation
[ $(uname -m) = x86_64 ] && curl -Lo ./kind https://kind.sigs.k8s.io/dl/v0.22.0/kind-linux-amd64
chmod +x ./kind
sudo mv ./kind /usr/local/bin/kind
After that, we’ll establish a custom Kind configuration with a control plane and three worker nodes. Alternatively, you can download and create the cluster using the same method.
# Kind Cluster Configuration
kind: Cluster
apiVersion: kind.x-k8s.io/v1alpha4
name: cluster1
nodes:
  # Control Plane Node
  - role: control-plane
    image: kindest/node:v1.25.3@sha256:f52781bc0d7a19fb6c405c2af83abfeb311f130707a0e219175677e366cc45d1
  # Worker Nodes
  - role: worker
    image: kindest/node:v1.25.3@sha256:f52781bc0d7a19fb6c405c2af83abfeb311f130707a0e219175677e366cc45d1
  - role: worker
    image: kindest/node:v1.25.3@sha256:f52781bc0d7a19fb6c405c2af83abfeb311f130707a0e219175677e366cc45d1
  - role: worker
    image: kindest/node:v1.25.3@sha256:f52781bc0d7a19fb6c405c2af83abfeb311f130707a0e219175677e366cc45d1
Now, let’s create the cluster using the following command:
Note: Below, I’ve used the alternative method of downloading the configuration to create the cluster. Alternatively, you can create a file named “single-and-multiple-kind.yaml” with the configurations above and run “kind create cluster –config single-and-multiple-kind.yaml”.
# Download the kind custom configuration
wget https://gist.githubusercontent.com/sbendarsky/e4670e17c5d5877a593540d3103a9ed1/raw/b537883c87194f6ba7f96b21a4755d97b06be5e9/single-and-multiple-kind.yaml
# And creating the cluster with the custom configuration
kind create cluster --config single-and-multiple-kind.yaml
After a while, your cluster will be ready, and you can verify the setup using the following commands. These commands enable you to check the status and configuration of your Kubernetes cluster, ensuring its successful creation and readiness for use in your development or testing environment.
kubectl cluster-info --context kind-cluster1
kubectl get nodes
Installing MetalLB
MetalLB, a software-based load balancer tailored for local Kubernetes environments like Kind, simplifies load balancing tasks. It enables the simulation of load balancer functionality within the cluster by dynamically assigning virtual IP addresses to services. In our project, MetalLB is crucial for exposing services externally in Kind, allowing seamless access to resources, including the Nginx Ingress Controller, for comprehensive testing and development.
Apply the following manifest and wait untill the pods are at a ready state
# installing the metallb via the manifest
kubectl apply -f https://raw.githubusercontent.com/metallb/metallb/v0.13.7/config/manifests/metallb-native.yaml
# checking if the pods are up
kubectl get pods -n metallb-system
To complete the Layer 2 configuration, MetalLB requires a range of IP addresses within the Docker Kind network. MetalLB dynamically allocates IP addresses to services within the cluster, utilizing a designated range for its control.
# Inspect Docker network for Kind cluster IPAM configuration
docker network inspect -f '{{.IPAM.Config}}' kind
In this scenario, with an output containing a CIDR like 172.18.0.0/16, we aim to allocate load balancer IP addresses from this subnet. To achieve this, MetalLB can be configured to utilize a specific range, such as 172.18.255.200 to 172.18.255.250, by creating an IPAddressPool and the associated L2Advertisement.
create a file named metallb-config.yaml with the below content.
# Define an IPAddressPool resource for MetalLB
apiVersion: metallb.io/v1beta1
kind: IPAddressPool
metadata:
  name: example
  namespace: metallb-system
spec:
  # Specify the range of IP addresses to allocate
  addresses:
    - 172.18.255.200-172.18.255.250

# Define an L2Advertisement resource for MetalLB
apiVersion: metallb.io/v1beta1
kind: L2Advertisement
metadata:
  name: empty
  namespace: metallb-system
and apply it with the following command:
kubectl apply -f metallb-config.yamlInstalling Harbor
Let’s add the Bitnami repository for Harbor by executing the following command:
helm repo add bitnami https://charts.bitnami.com/bitnami
helm repo update
Create a file named values.yaml to store configuration values for your application. This file specifies parameters such as external URL and admin password, crucial for configuring the application environment.
externalURL: https://registry-stav.octopus.lab
adminPassword: "admin"
nginx:
  tls:
    commonName: registry-stav.octopus.lab
We’ll be accessing the Harbor registry at registry-stav.octopus.lab
Please change the admin password after deployment for security reasons.
Note: You can update the values according to your requirements.
Let’s continue by installing the Harbor Helm chart provided by Bitnami.
# Install Harbor using Helm
helm install harbor bitnami/harbor -n harbor -f values.yaml --create-namespace

# Once installation is complete, check the service and retrieve the external IP
kubectl get svc -n harbor
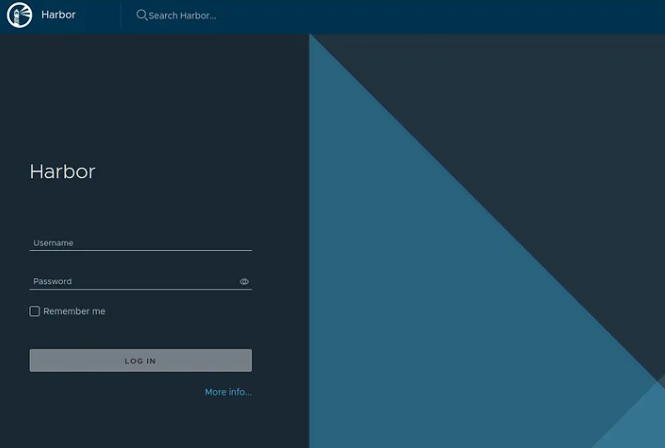
In my case, the Harbor service load balancer IP is 172.18.255.200. Let’s add an entry in the /etc/hosts file to map the domain (in my case registry-stav.octopus.lab, adjust it according to your domain) to the Harbor load balancer IP. After adding the entry in the /etc/hosts file, let’s try accessing the domain in a browser.
We will log in via the username: admin and the password: admin
Python Application Deployment with Harbor and Helm Chart
Excellent, now we’ll navigate to the Harbor GUI and create a new project. We’ll give it the name “hot-cold” to align with our project.

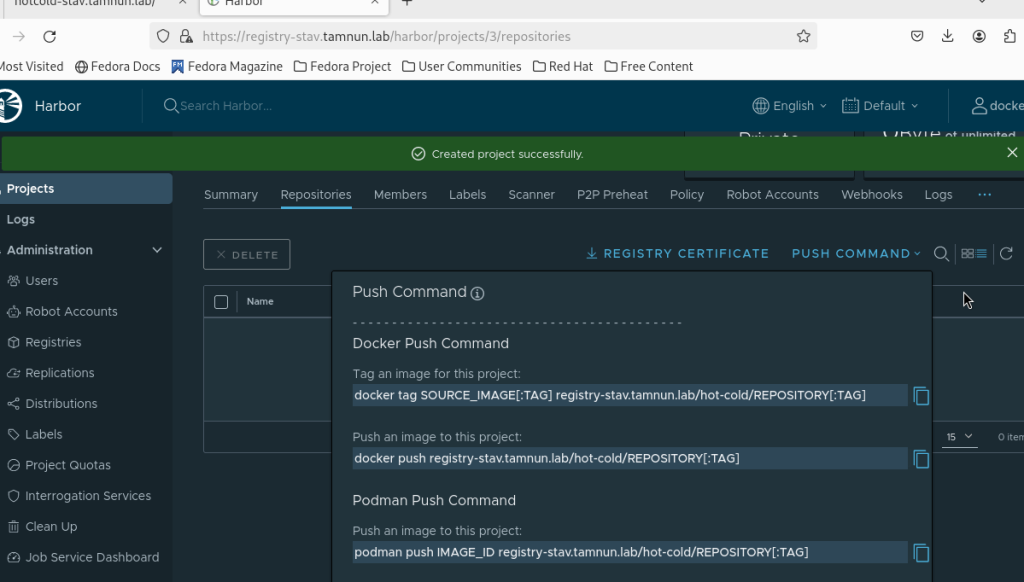
In the images above, you can observe the Harbor GUI interface, as well as the step-by-step process of creating the “hot-cold” project.
Building Python App, Creating Image, and Pushing to Harbor
I’ve developed a basic Python Flask app and a corresponding Dockerfile. Now, the next step is to push these artifacts to Harbor for storage and accessibility.
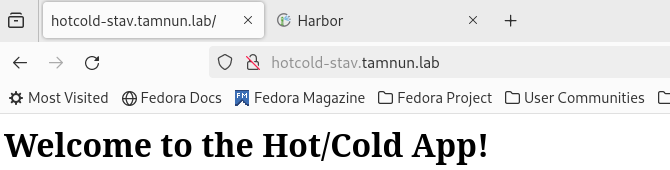
This Python application, named “hot-cold.py”, is a simple Flask web application. It consists of three routes:
- Root Route (“/”): Displays a welcome message to the Hot/Cold App.
- Hot Route (“/hot”): Renders a page with a red background and a message indicating that it is the Hot page.
- Cold Route (“/cold”): Renders a page with a blue background and a message indicating that it is the Cold page.
The application serves as a basic demonstration of routing and HTML rendering capabilities using Flask.
# hot-cold.py

from flask import Flask

app = Flask(__name__)

# Route for the root page
@app.route('/')
def root():
    return '<html><body><h1>Welcome to the Hot/Cold App!</h1></body></html>'

# Route for the hot page
@app.route('/hot')
def hot():
    return '<html><body style="background-color:red;"><h1>This is the Hot page!</h1></body></html>'

# Route for the cold page
@app.route('/cold')
def cold():
    return '<html><body style="background-color:blue;"><h1>This is the Cold page!</h1></body></html>'

if __name__ == '__main__':
    # Run the Flask app
    app.run(host='0.0.0.0', port=8080)
Requirements File for the Python App
Next, we’ll create a requirements.txt file that contains the dependencies necessary for our Python application. This file will be used to install the required packages in our Docker image.
# Requirements.txt
# List of dependencies for the Python Flask application

# Flask web framework
Flask==3.0.2

# Other dependencies which are installed with Flask
blinker==1.7.0
click==8.1.7
itsdangerous==2.1.2
Jinja2==3.1.3
MarkupSafe==2.1.5
Werkzeug==3.0.1
Dockerfile for Building our Image
Afterwards, we can create a simple Dockerfile that will utilize the requirements.txt file to install the necessary dependencies and then run the Python application.
# Dockerfile for building the Python Flask application image

# Use the official Python image as base
FROM python:3.9-slim

# Set the working directory in the container
WORKDIR /app

# Copy the requirements file into the container at /app
COPY requirements.txt .

# Install the dependencies
RUN pip install --no-cache-dir -r requirements.txt

# Copy the application code into the container at /app
COPY . .

# Expose port 8080 to the outside world
EXPOSE 8080

# Command to run the Flask application
CMD ["python", "hot-cold.py"]
Additionally, we need to ensure that the self-signed Harbor registry is added to the Docker daemon. This step is crucial for enabling the push of images to the registry.
Firstly, let’s open the /etc/docker/daemon.json file using a text editor. Then, we’ll add the following configuration:
# vi /etc/docker/daemon.json
{
   "insecure-registries" : [ "registry-stav.octopus.lab" ] # You can change it to your own
}
After adding the configuration to the daemon.json file, we’ll need to reload the Docker daemon and restart Docker. Please note that these commands will shut down the Docker service temporarily, so please be patient as it may take a few minutes to complete.
# Save changes and reload Docker
systemctl daemon-reload
systemctl restart docker
Now, let’s proceed to build the Docker image for our application and push it to Harbor. We’ll follow these steps:
# Build the Docker image for the HotCold application
docker build -t hotcold:latest .

# Tag the built image with the address of our Harbor registry
docker tag hotcold:latest registry-stav.octopus.lab/hotcold/hotcold:latest

# Log in to the Harbor registry
docker login registry-stav.octopus.lab

# Push the tagged image to Harbor
docker push registry-stav.octopus.lab/hotcold/hotcold:latest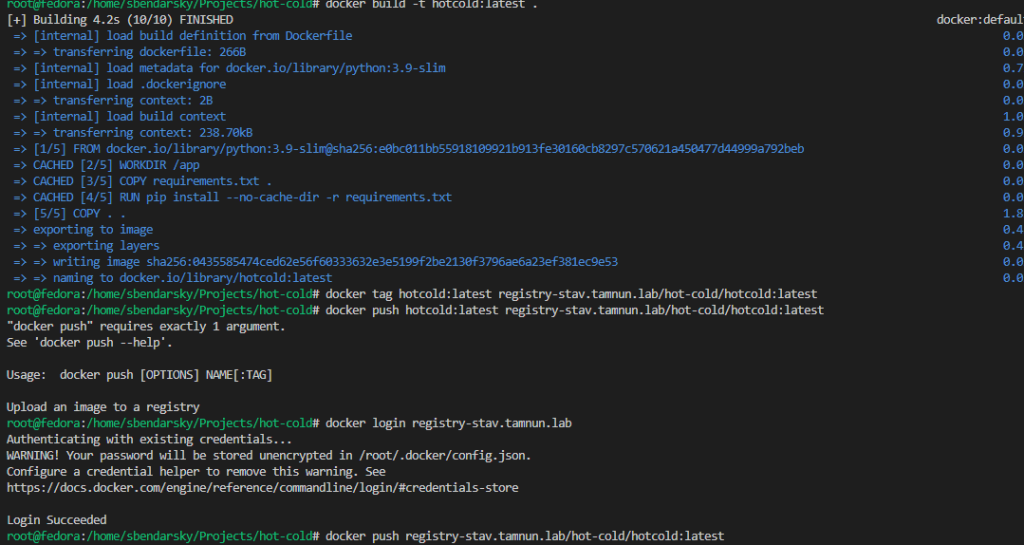
In the image above, you can observe the output generated during the pushing process.
After pushing the image, it’s crucial to establish trust between Docker and the registry. This requires downloading the registry certificate through the GUI and updating it within each container.
Please Note: You’ll need to repeat the following commands for each container:
# Copy the ca.crt (registry certificate) to the control plane Docker container
docker cp /home/sbendarsky/Downloads/ca.crt cluster1-control-plane:/etc/ssl/certs

# Update the CA certificate within the container
docker exec cluster1-control-plane update-ca-certificates

# Restart the containerd service in the node
docker exec cluster1-control-plane systemctl restart containerd
Optimized Kubernetes Configurations for Python App Deployment
Installing Nginx-Ingress
Nginx-Ingress plays a crucial role in Kubernetes deployments by serving as a highly efficient and flexible ingress controller. It acts as a gateway for external traffic entering the Kubernetes cluster, directing requests to the appropriate services based on defined routing rules.
Installing Nginx-Ingress for Kubernetes
# Download the Nginx-Ingress Helm chart from the OCI registry and extract it
helm pull oci://ghcr.io/nginxinc/charts/nginx-ingress --untar --version 1.1.3

# Navigate into the extracted directory
cd nginx-ingress

# Apply Custom Resource Definitions (CRDs) required by Nginx-Ingress
kubectl apply -f crds/

# Install Nginx-Ingress using Helm
helm install nginx-ingress oci://ghcr.io/nginxinc/charts/nginx-ingress --version 1.1.3
Namespace Configuration:
This YAML configuration defines a Kubernetes Namespace named hotcold-namespace. Namespaces provide a way to organize and isolate resources within a Kubernetes cluster, allowing teams to manage multiple applications or environments more effectively.
apiVersion: v1
kind: Namespace
metadata:
  name: hotcold-namespace   # Name of the namespace
Deployment Configuration:
This YAML config defines a Kubernetes Deployment named hotcold-app in the hotcold-namespace. It creates one replica of hotcold-container using the Harbor image registry-stav.octopus.lab/hotcold/hotcold:latest, listening on port 8080. The deployment maintains the specified pod count as per the provided config.
apiVersion: apps/v1
kind: Deployment
metadata:
  name: hotcold-app                   # Name of the deployment
  namespace: hotcold-namespace       # Namespace where the deployment belongs
spec:
  replicas: 1                        # Number of desired replicas of the pod
  selector:
    matchLabels:
      app: hotcold-app               # Label selector for identifying pods managed by this deployment
  template:
    metadata:
      labels:
        app: hotcold-app            # Labels to be applied to pods created by this deployment
    spec:
      containers:
      - name: hotcold-container     # Name of the container
        image: registry-stav.octopus.lab/hotcold/hotcold:latest   #  Image from our harbor registry
        ports:
        - containerPort: 8080       # Port to expose on the container
Service Configurations:
This YAML configuration defines a Kubernetes Service named hotcold-service within the hotcold-namespace namespace. It specifies that traffic should be routed to pods with the label app: hotcold-app and exposes port 80 externally, forwarding it to port 8080 on the pods.
apiVersion: v1
kind: Service
metadata:
  name: hotcold-service             # Name of the service
  namespace: hotcold-namespace     # Namespace where the service belongs
spec:
  selector:
    app: hotcold-app               # Selector to match pods for routing traffic
  ports:
  - protocol: TCP
    port: 80                       # Port exposed by the service
    targetPort: 8080              # Port on the pods to which traffic will be routed
Ingress Configurations:
This YAML configuration defines a Kubernetes Ingress named hotcold-ingress within the hotcold-namespace namespace. It specifies that traffic coming to the host hotcold-stav.octopus.lab should be routed to the hotcold-service Service on port 80. The kubernetes.io/ingress.class: “nginx” annotation indicates that Nginx should be used as the Ingress controller.
apiVersion: networking.k8s.io/v1
kind: Ingress
metadata:
  name: hotcold-ingress            # Name of the Ingress resource
  namespace: hotcold-namespace     # Namespace where the Ingress belongs
  annotations:
    kubernetes.io/ingress.class: "nginx"  # Annotation specifying the Ingress class
spec:
  rules:
  - host: hotcold-stav.octopus.lab  # Host for which the Ingress should route traffic
    http:
      paths:
      - path: /                       # Path for routing traffic
        pathType: Prefix              # Type of path matching
        backend:
          service:
            name: hotcold-service     # Service to route traffic to
            port:
              number: 80               # Port on the service to forward traffic to
Deploying Kubernetes Configuration Files
We’ll deploy our Kubernetes configuration files using the following commands:
# Apply the namespace configuration
kubectl apply -f namespace.yaml

# Apply the deployment configuration
kubectl apply -f deployment.yaml

# Apply the service configuration
kubectl apply -f service.yaml

# Apply the ingress configuration
kubectl apply -f ingress.yaml
In the image above, we’ve implemented all our Kubernetes configuration files. Here, you can observe the output of the pods and the ingress.
Creating a Helm Chart from Kubernetes Configurations
To initiate the creation of the Helm chart, execute the following command:
helm create hotcold-chart # Create a new Helm chart named hotcold-chartAfter creating the Helm chart with the initial command, you can customize it by modifying the files. In my case, I removed all contents from the templates folder except _helpers.tpl. Then, I created the following files: ingress.yaml, namespace.yaml, deployment.yaml, and service.yaml.

In the image provided, you can observe the directory structure of the Helm chart along with the files present in the templates folder.
Configuring Our Helm Chart
values.yaml:
This YAML configuration file defines various parameters for our Helm Chart. It specifies the number of replicas for the deployment, the details of the image to be used, the service configuration including port mappings, the ingress settings such as the host and path, and the namespace in which the application will be deployed.
# Specifies the number of replicas for the deployment
replicaCount: 3

# Defines the image details for the application
image:
  repository: hotcold-stav.octopus.lab/hotcold/hotcold
  tag: latest
  pullPolicy: IfNotPresent

# Configuration for the service
service:
  name: hotcold-service
  port: 80
  targetPort: 8080

# Configuration for the ingress
ingress:
  enabled: true
  className: "nginx"
  host: hotcold-stav.octopus.lab
  path: /
  pathType: Prefix

# Configuration for the namespace
namespace:
  name: hotcold-namespace
templates/service.yaml:
This YAML snippet represents a Kubernetes Service definition. It includes metadata such as the service name and namespace, and specifies the selector for the service, ports configuration, and service type. The values for service port and target port are obtained from Helm chart values.
apiVersion: v1
kind: Service

metadata:
  # Name of the service derived from the Helm Chart's fullname
  name: {{ include "hotcold-chart.fullname" . }}-service
  # Namespace where the service is deployed
  namespace: {{ .Release.Namespace }}

spec:
  # Selector for the service
  selector:
    app: hotcold-app
  # Ports configuration
  ports:
  - protocol: TCP
    port: {{ .Values.service.port }} # Service port defined in Helm values
    targetPort: {{ .Values.service.targetPort }} # Target port defined in Helm values
  # Type of service
  type: ClusterIP
templates/namespace.yaml:
This YAML file defines a Kubernetes Namespace. It specifies the namespace name retrieved from Helm values.
apiVersion: v1
kind: Namespace

metadata:
  # Name of the namespace obtained from Helm values
  name: {{ .Values.namespace.name }}
templates/ingress.yaml
This YAML snippet defines an Ingress resource for routing HTTP traffic in Kubernetes. It includes metadata such as the name and namespace of the Ingress, annotations for customization, and rules for routing traffic based on the specified host and path. The backend service for routing traffic is defined along with its port. The Ingress configuration is conditionally enabled based on the value of .Values.ingress.enabled.
{{- if .Values.ingress.enabled -}}

# Defines an Ingress resource for routing HTTP traffic

apiVersion: networking.k8s.io/v1
kind: Ingress

metadata:
  # Name of the Ingress derived from the Helm Chart's fullname
  name: {{ include "hotcold-chart.fullname" . }}
  # Namespace where the Ingress is deployed
  namespace: {{ .Release.Namespace }}
  # Annotations for the Ingress
  annotations:
    kubernetes.io/ingress.class: "{{ .Values.ingress.className }}"

spec:
  # Rules for the Ingress
  rules:
  - host: {{ .Values.ingress.host }}
    http:
      paths:
      - path: {{ .Values.ingress.path }}
        pathType: {{ .Values.ingress.pathType }}
        backend:
          # Backend service for routing traffic
          service:
            name: {{ include "hotcold-chart.fullname" . }}-service
            port:
              number: {{ .Values.service.port }}
{{- end }}
templates/deployment.yaml
This YAML file defines a Kubernetes Deployment for managing application instances. It specifies metadata such as the name and namespace of the Deployment, the number of replicas, and the configuration for the pod template including container details like image, pull policy, and ports.
apiVersion: apps/v1
kind: Deployment

metadata:
  # Name of the Deployment derived from the Helm Chart's fullname
  name: {{ include "hotcold-chart.fullname" . }}
  # Namespace where the Deployment is deployed
  namespace: {{ .Release.Namespace }}

spec:
  # Number of replicas for the Deployment
  replicas: {{ .Values.replicaCount }}

  selector:
    matchLabels:
      app: hotcold-app

  template:
    metadata:
      labels:
        app: hotcold-app

    spec:
      # Containers configuration
      containers:
      - name: hotcold-container
        # Image details obtained from Helm values
        image: "{{ .Values.image.repository }}:{{ .Values.image.tag }}"
        # Image pull policy obtained from Helm values
        imagePullPolicy: {{ .Values.image.pullPolicy }}
        # Ports configuration for the container
        ports:
        - containerPort: 8080
Installing our own Helm Chart
and now, after creating and modifying our helm chart we can install it with this command:
helm install hotcold ./hotcold-chart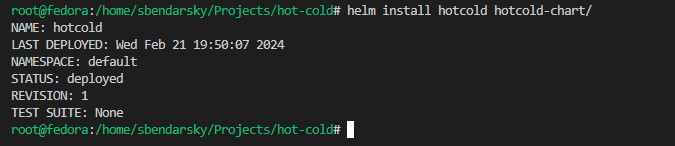


Summary
This project outlines the setup of a Kubernetes development environment using Kind and Harbor. We created a local Kubernetes cluster with Kind and established a local registry with Harbor for storing Docker images. Using straightforward YAML configurations, we deployed a Python Flask application and utilized tools like MetalLB and Helm charts for efficient deployment. This article serves as a practical guide for developers looking to replicate similar Kubernetes development setups.