Introduction
Following our previous guide of How to Deploy a Kubernetes K3s on Raspberry Pi , we wanted a more robust network interface to our Kubernetes cluster. This is why I decided to do this guide on How to Deploy Highly Available Cilium on Raspberry Pi . We will be using K3s this time as well. The advantages of Cilium are immense. From its use of eBPF technology and envoy up to monitoring traffic inside the cluster. This is a series blog post for Cilium. In the next posts we will discuss more advanced features Cilium provides.
Let’s get started
Procedure
This guide assumes you’ve got the same setup like in the previous guide. With 3 masters and 1 additional worker.
Install the First Control Plane Node
Let’s install a k3s master with Cilium. We will use Cilium to replace kube-proxy as well.
$ curl -sfL https://get.k3s.io | INSTALL_K3S_EXEC='server --cluster-init --flannel-backend=none --disable-kube-proxy --disable servicelb --disable-network-policy --disable=traefik' sh -You should see this output:
[INFO]  Finding release for channel stable
[INFO]  Using v1.31.4+k3s1 as release
[INFO]  Downloading hash https://github.com/k3s-io/k3s/releases/download/v1.31.4+k3s1/sha256sum-arm64.txt
[INFO]  Downloading binary https://github.com/k3s-io/k3s/releases/download/v1.31.4+k3s1/k3s-arm64
[INFO]  Verifying binary download
[INFO]  Installing k3s to /usr/local/bin/k3s
[INFO]  Skipping installation of SELinux RPM
[INFO]  Creating /usr/local/bin/kubectl symlink to k3s
[INFO]  Creating /usr/local/bin/crictl symlink to k3s
[INFO]  Creating /usr/local/bin/ctr symlink to k3s
[INFO]  Creating killall script /usr/local/bin/k3s-killall.sh
[INFO]  Creating uninstall script /usr/local/bin/k3s-uninstall.sh
[INFO]  env: Creating environment file /etc/systemd/system/k3s.service.env
[INFO]  systemd: Creating service file /etc/systemd/system/k3s.service
[INFO]  systemd: Enabling k3s unit
Created symlink /etc/systemd/system/multi-user.target.wants/k3s.service → /etc/systemd/system/k3s.service.
[INFO]  systemd: Starting k3s
Verify the control plane:
$ sudo k3s kubectl get nodes
$ sudo k3s kubectl get pods -A
Get the Token from the first node:
$ sudo cat /var/lib/rancher/k3s/server/tokenInstall the other Control Plane nodes
$ export TOKEN="xxxxxxxxxxxxxxxxxxxxxxxxxxxxxxxxxxxxxxxxxxxxxxxxxxxxxxxx::server:xxxxxxxxxxxxxx"
$ curl -sfL https://get.k3s.io | INSTALL_K3S_EXEC="server --server https://<server-ip>:6443 --flannel-backend=none --disable-kube-proxy --disable servicelb --disable-network-policy --disable=traefik --token $TOKEN" sh -
OPTIONAL – Install additional workers
If you want to install additional worker nodes, that won’t run the control plane, use the following:
$ curl -sfL https://get.k3s.io | INSTALL_K3S_EXEC="agent --server https://<server-ip>:6443 --token $TOKEN" sh -Check status:
$ sudo k3s kubectl get nodesNAME STATUS ROLES AGE VERSION
k8s-rpi0 NotReady control-plane,etcd,master 8m59s v1.30.6+k3s1
k8s-rpi1 NotReady control-plane,etcd,master 6m5s v1.30.6+k3s1
k8s-rpi2 NotReady control-plane,etcd,master 5m51s v1.30.6+k3s1
k8s-rpi3 NotReady <none> 40s v1.30.6+k3s1$ sudo k3s kubectl get pods -ANAMESPACE NAME READY STATUS RESTARTS AGE
kube-system coredns-7b98449c4-nmpht 0/1 Pending 0 8m40s
kube-system helm-install-traefik-crd-fwm9q 0/1 Pending 0 8m40s
kube-system helm-install-traefik-fgdvr 0/1 Pending 0 8m40s
kube-system local-path-provisioner-595dcfc56f-7fxqz 0/1 Pending 0 8m40s
kube-system metrics-server-cdcc87586-zgfs6 0/1 Pending 0 8m40sSetup user access to the cluster
mkdir -p $HOME/.kube
sudo cp -i /etc/rancher/k3s/k3s.yaml $HOME/.kube/config
sudo chown $(id -u):$(id -g) $HOME/.kube/config
echo "export KUBECONFIG=$HOME/.kube/config" >> $HOME/.bashrc
source $HOME/.bashrc
Install Cilium
Install helm:
$ curl https://raw.githubusercontent.com/helm/helm/main/scripts/get-helm-3 | bashAdd cilium repo:
$ helm repo add cilium https://helm.cilium.io/
$ helm repo update
Install using Helm:
$ API_SERVER_IP=<your_api_server_ip>
# Kubeadm default is 6443
$ API_SERVER_PORT=<your_api_server_port>
$ helm install cilium cilium/cilium --version 1.16.5 \
    --namespace cilium-system \
    --set kubeProxyReplacement=true \
    --set ingressController.enabled=true \
    --set ingressController.loadbalancerMode=shared \
    --set ingressController.default=true \
    --set l2announcements.enabled=true \
    --set rollOutCiliumPods=true \
    --set-string service.annotations."io\.cilium/lb-ipam-ips"=10.10.10.240 \
    --set ipv4NativeRoutingCIDR="10.10.10.0/24" \
    --set ipam.operator.clusterPoolIPv4PodCIDRList="10.42.0.0/16" \
    --set k8sServiceHost=${API_SERVER_IP} \
    --set k8sServicePort=${API_SERVER_PORT} \
    --set devices=eth0
Wait a while and check the status:
$ sudo k3s kubectl get nodesNAME STATUS ROLES AGE VERSION
k8s-rpi0 Ready control-plane,etcd,master 38m v1.31.4+k3s1
k8s-rpi1 Ready control-plane,etcd,master 34m v1.31.4+k3s1
k8s-rpi2 Ready control-plane,etcd,master 34m v1.31.4+k3s1
k8s-rpi3 Ready <none> 34m v1.31.4+k3s1$ sudo k3s kubectl get pods -A -o wide$ sudo k3s kubectl get pods -A -o wide
NAMESPACE NAME READY STATUS RESTARTS AGE IP NODE NOMINATED NODE READINESS GATES
cilium-system cilium-8jvqm 1/1 Running 0 3m45s 10.10.10.212 k8s-rpi2 <none> <none>
cilium-system cilium-envoy-4fz67 1/1 Running 0 3m45s 10.10.10.213 k8s-rpi3 <none> <none>
cilium-system cilium-envoy-kzn96 1/1 Running 0 3m45s 10.10.10.211 k8s-rpi1 <none> <none>
cilium-system cilium-envoy-qdkv2 1/1 Running 0 3m45s 10.10.10.210 k8s-rpi0 <none> <none>
cilium-system cilium-envoy-wl4m2 1/1 Running 0 3m45s 10.10.10.212 k8s-rpi2 <none> <none>
cilium-system cilium-operator-647d5757cf-cb7jl 1/1 Running 0 3m45s 10.10.10.213 k8s-rpi3 <none> <none>
cilium-system cilium-operator-647d5757cf-tj6gp 1/1 Running 0 3m44s 10.10.10.212 k8s-rpi2 <none> <none>
cilium-system cilium-t4hhs 1/1 Running 0 3m45s 10.10.10.213 k8s-rpi3 <none> <none>
cilium-system cilium-vp6xl 1/1 Running 0 3m45s 10.10.10.211 k8s-rpi1 <none> <none>
cilium-system cilium-w4gdj 1/1 Running 0 3m45s 10.10.10.210 k8s-rpi0 <none> <none>
kube-system coredns-ccb96694c-l9bvz 1/1 Running 0 7h34m 10.42.0.238 k8s-rpi0 <none> <none>
kube-system local-path-provisioner-5cf85fd84d-gq5fk 1/1 Running 0 7h34m 10.42.0.209 k8s-rpi0 <none> <none>
kube-system metrics-server-5985cbc9d7-nn7xc 1/1 Running 0 7h34m 10.42.0.46 k8s-rpi0 <none> <none>Install Cilium CLI
CILIUM_CLI_VERSION=$(curl -s https://raw.githubusercontent.com/cilium/cilium-cli/main/stable.txt)
CLI_ARCH=amd64
if [ "$(uname -m)" = "aarch64" ]; then CLI_ARCH=arm64; fi
curl -L --fail --remote-name-all https://github.com/cilium/cilium-cli/releases/download/${CILIUM_CLI_VERSION}/cilium-linux-${CLI_ARCH}.tar.gz{,.sha256sum}
sha256sum --check cilium-linux-${CLI_ARCH}.tar.gz.sha256sum
sudo tar xzvfC cilium-linux-${CLI_ARCH}.tar.gz /usr/local/bin
rm cilium-linux-${CLI_ARCH}.tar.gz{,.sha256sum}
NOTE: The current stable version is
v0.16.23
Check Cilium status
Let’s use the cilium cli we just installed to check status:
$ cilium status --wait -n cilium-systemDeploy Cilium LoadBalancer IP Pool range
In order for Cilium to be able to put IPs on LoadBalancer just like in Cloud providers, we must provide it with a range of IPs it can use to attach external IPs to the LoadBalancer
apiVersion: "cilium.io/v2alpha1"
kind: CiliumLoadBalancerIPPool
metadata:
  name: "k8s-co-il-pool"
spec:
  blocks:
    - start: "10.10.10.240"
      stop: "10.10.10.250"
Deploy the cilium-lbippool.yaml:
$ kubectl create -f cilium-lbippool.yamlDeploy Cilium L2 Announcement Policy
This configures which services should be announced by Cilium
apiVersion: cilium.io/v2alpha1
kind: CiliumL2AnnouncementPolicy
metadata:
  name: default-l2-announcement-policy
  namespace: cilium-system
spec:
  externalIPs: true
  loadBalancerIPs: true
Let’s create the policy:
$ kubectl create -f cilium-l2announcementpolicy.yamlYou should now be able to see External IPs on your services:
NAMESPACE       NAME             TYPE           CLUSTER-IP      EXTERNAL-IP    PORT(S)                      AGE     SELECTOR
cilium-system   cilium-envoy     ClusterIP      None            <none>         9964/TCP                     9m11s   k8s-app=cilium-envoy
cilium-system   cilium-ingress   LoadBalancer   10.43.242.43    10.10.10.240   80:32476/TCP,443:30210/TCP   9m11s   <none>
cilium-system   hubble-peer      ClusterIP      10.43.63.97     <none>         443/TCP                      9m11s   k8s-app=cilium
cilium-system   hubble-relay     ClusterIP      10.43.223.236   <none>         80/TCP                       6m40s   k8s-app=hubble-relay
Install Hubble Observability
Because we are using Helm we can do this using the following helm command:
$ helm upgrade cilium cilium/cilium --version 1.16.5 \
   --namespace cilium-system \
   --reuse-values \
   --set hubble.relay.enabled=true \
   --set hubble.ui.enabled=true \
   --set hubble.ui.ingress.enabled=true \
   --set hubble.ui.ingress.hosts[0]="hubble.k8s-co-il.lan" \
   --set-string hubble.ui.ingress.annotations."ingress\.kubernetes\.io/ssl-redirect"=false
Check status again:
$ cilium status --wait -n cilium-system$ cilium status
/¯¯\
/¯¯\__/¯¯\ Cilium: OK
\__/¯¯\__/ Operator: OK
/¯¯\__/¯¯\ Envoy DaemonSet: OK
\__/¯¯\__/ Hubble Relay: OK
\__/ ClusterMesh: disabled
DaemonSet cilium Desired: 4, Ready: 4/4, Available: 4/4
DaemonSet cilium-envoy Desired: 4, Ready: 4/4, Available: 4/4
Deployment cilium-operator Desired: 2, Ready: 2/2, Available: 2/2
Deployment hubble-relay Desired: 1, Ready: 1/1, Available: 1/1
Deployment hubble-ui Desired: 1, Ready: 1/1, Available: 1/1
Containers: cilium Running: 4
cilium-envoy Running: 4
cilium-operator Running: 2
hubble-relay Running: 1
hubble-ui Running: 1
Cluster Pods: 9/9 managed by Cilium
Helm chart version: 1.16.3
Image versions cilium quay.io/cilium/cilium:v1.16.3@sha256:62d2a09bbef840a46099ac4c69421c90f84f28d018d479749049011329aa7f28: 4
cilium-envoy quay.io/cilium/cilium-envoy:v1.29.9-1728346947-0d05e48bfbb8c4737ec40d5781d970a550ed2bbd@sha256:42614a44e508f70d03a04470df5f61e3cffd22462471a0be0544cf116f2c50ba: 4
cilium-operator quay.io/cilium/operator-generic:v1.16.3@sha256:6e2925ef47a1c76e183c48f95d4ce0d34a1e5e848252f910476c3e11ce1ec94b: 2
hubble-relay quay.io/cilium/hubble-relay:v1.16.3@sha256:feb60efd767e0e7863a94689f4a8db56a0acc7c1d2b307dee66422e3dc25a089: 1
hubble-ui quay.io/cilium/hubble-ui-backend:v0.13.1@sha256:0e0eed917653441fded4e7cdb096b7be6a3bddded5a2dd10812a27b1fc6ed95b: 1
hubble-ui quay.io/cilium/hubble-ui:v0.13.1@sha256:e2e9313eb7caf64b0061d9da0efbdad59c6c461f6ca1752768942bfeda0796c6: 1
Install Hubble CLI
HUBBLE_VERSION=$(curl -s https://raw.githubusercontent.com/cilium/hubble/master/stable.txt)
HUBBLE_ARCH=amd64
if [ "$(uname -m)" = "aarch64" ]; then HUBBLE_ARCH=arm64; fi
curl -L --fail --remote-name-all https://github.com/cilium/hubble/releases/download/$HUBBLE_VERSION/hubble-linux-${HUBBLE_ARCH}.tar.gz{,.sha256sum}
sha256sum --check hubble-linux-${HUBBLE_ARCH}.tar.gz.sha256sum
sudo tar xzvfC hubble-linux-${HUBBLE_ARCH}.tar.gz /usr/local/bin
rm hubble-linux-${HUBBLE_ARCH}.tar.gz{,.sha256sum}
NOTE: the current hubble stable version is
v1.16.3
Validate Hubble API Access
Let’s create a port-forward to have access to 4245 port
$ cilium hubble port-forward&Check status
$ hubble status
Healthcheck (via localhost:4245): Ok
Current/Max Flows: 15,969/16,380 (97.49%)
Flows/s: 123.70
Connected Nodes: 4/4
We can look at the Hubble flows with the following command:
$ hubble observeYou can kill the port-forward with:
$ jobs
$ kill % 1
Check Connectivity
$ cilium connectivity test.....................................
📋 Test Report [cilium-test-1]
❌ 1/59 tests failed (4/622 actions), 43 tests skipped, 0 scenarios skipped:
Test [no-unexpected-packet-drops]:
❌ no-unexpected-packet-drops/no-unexpected-packet-drops/default/rpi1
❌ no-unexpected-packet-drops/no-unexpected-packet-drops/default/rpi2
❌ no-unexpected-packet-drops/no-unexpected-packet-drops/default/rpi3
❌ no-unexpected-packet-drops/no-unexpected-packet-drops/default/rpi0
[cilium-test-1] 1 tests failedNOTE: VLAN traffic disallowed by the VLAN filter by default
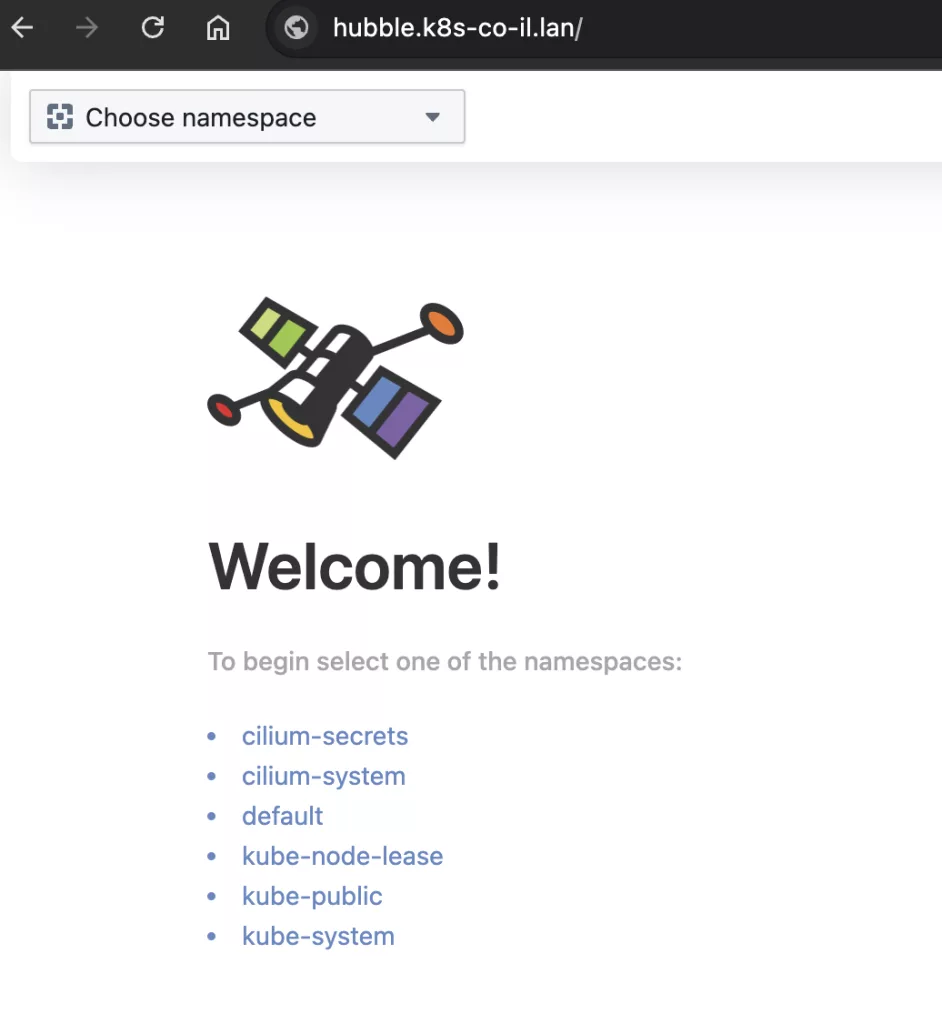
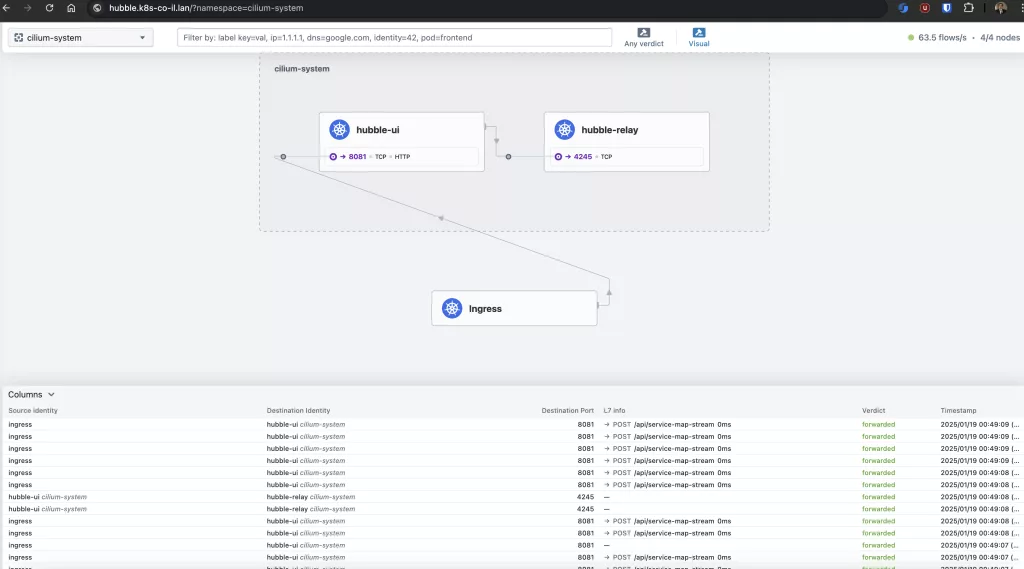
We can also navigate to the hubble web page:

And monitor LIVE traffic!

Summary
In this guide on How to Deploy Cilium on Raspberry Pi, we explored setting up a robust networking solution for Kubernetes clusters running on K3s. Beyond just deployment, we overcame the challenges of enabling Cilium to work with LoadBalancer service types in air-gapped or disconnected environments. Eventually showing the achievement of monitoring traffic inside the Kubernetes cluster. At Octopus Computer Solutions, our expertise in configuring advanced networking solutions for air-gapped Kubernetes clusters ensures that even complex setups like this can be handled efficiently and securely.


